
Keying Models and Decorations

The keying tool enables you to add keys (round or rectangular pegs and holes) to decorations, including models you import yourself.
You can then export them as seperate objects from your base, print them out, and glue them together later.
Doing this allows you to print out the base in one orientation and the model in another for a cleaner result.
Access the keying tool by clicking on the green tools button in the bottom bar and then on the keying button. If there are no decorations in the scene it will be greyed out.
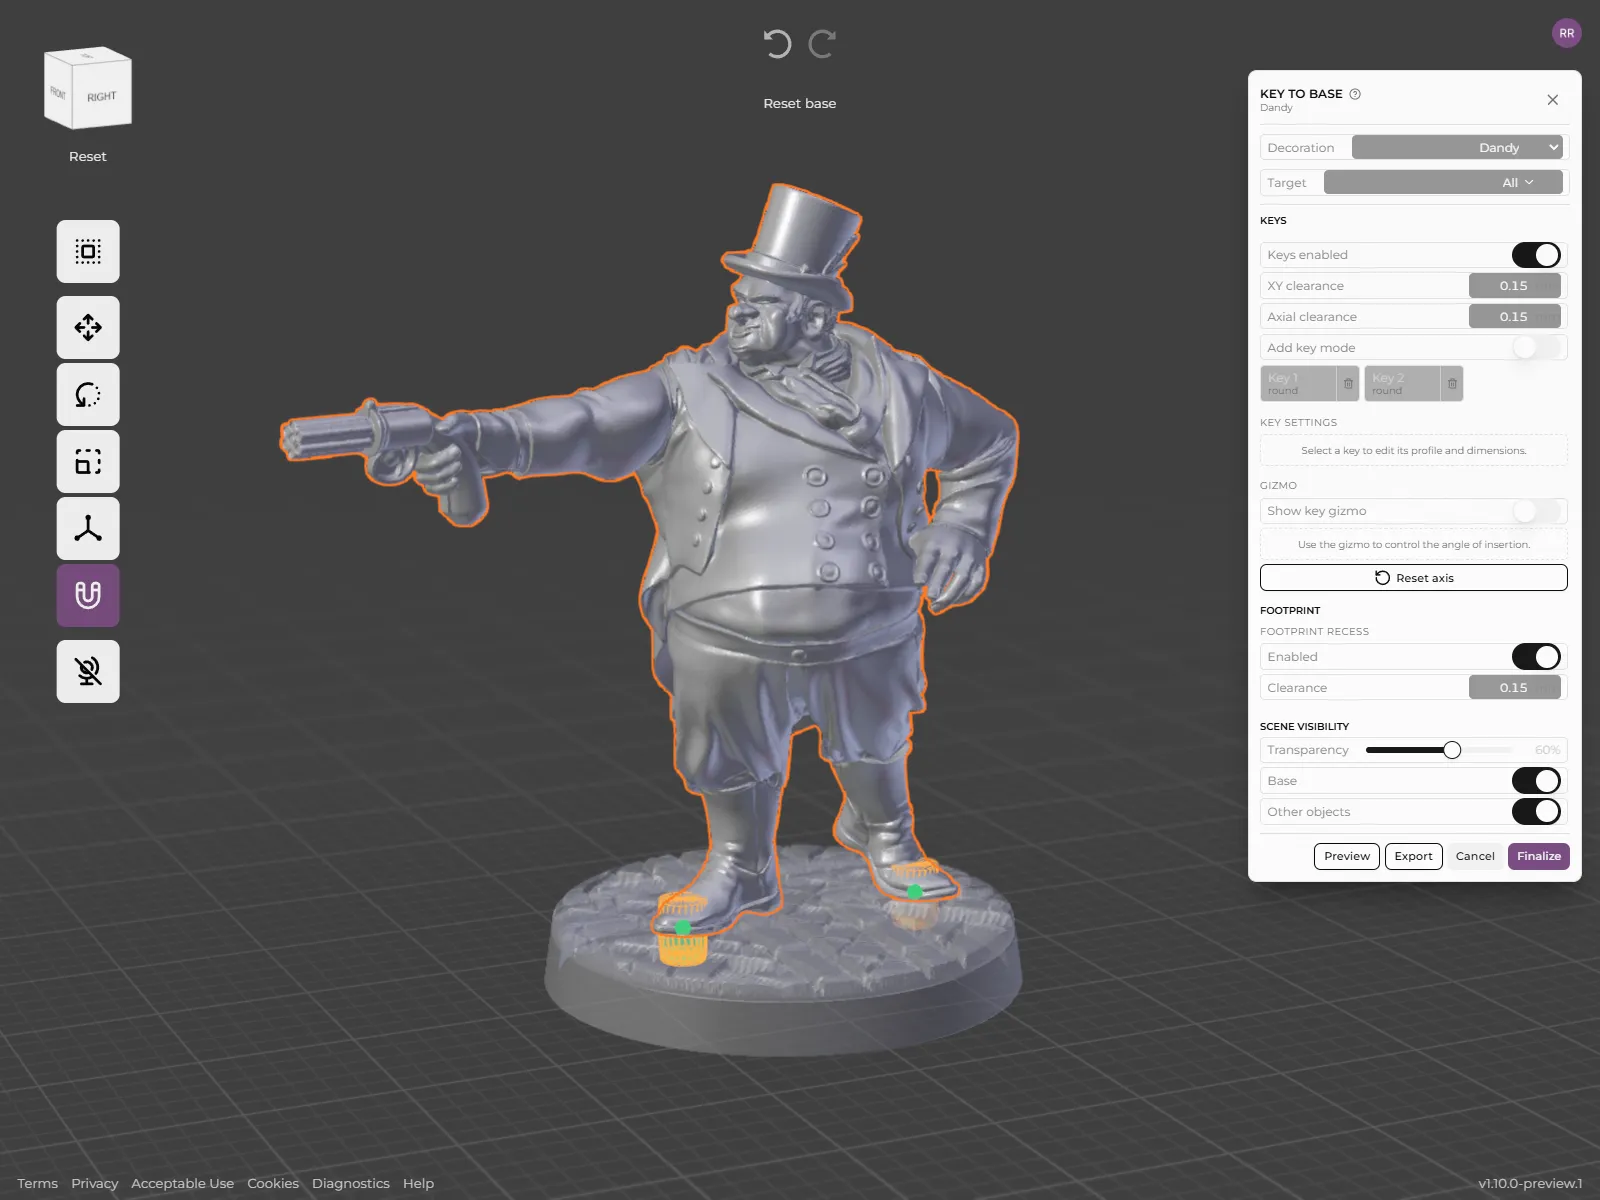
When the keying tool is active the bottom bar will be hidden and the base and any decorations not currently selected will turn transparent. On the right is the keying menu.
Here you can switch between decorations to add keys to and choose whether those keys will create holes in the topper, the base bottom, other decorations or everything.
Turning on Keys Enabled will allow you to enter Add key mode. When keys are enabled any export will add keys to your decoration and create holes in the target meshes.
When Add key mode is active clicking anywhere on the selected decoration will add a male key. By default these are cylindrical, but you can also choose to add cuboid capsule keys.
You can set the XY clearance (distance from sides) and Axial clearance (distance from the end) for all keys so you can actually insert the models into the base. I’ve found that an XY clearance of 0.15 gives a snug “push fit” on both FDM and resin printers, but this will vary based on your settings.
Clicking on the numbered key card in the menu will bring up individual options for each key. You can switch between cylcindrical and capsule keys, set the diameter or XY dimensions and set the chamfer and how far from the tip the chamfer starts, as well as the height. The socket back extension removes material from the target above the key which can be useful if the key starts slightly below the surface of the base and you are not using the footrpint recess feature.
Show key gizmo shows a rotation gizmo that controls the rotation of all keys on a decoration simultaneously. Only a single rotation is allowed as physically there usually needs to be a single axis of insertion.
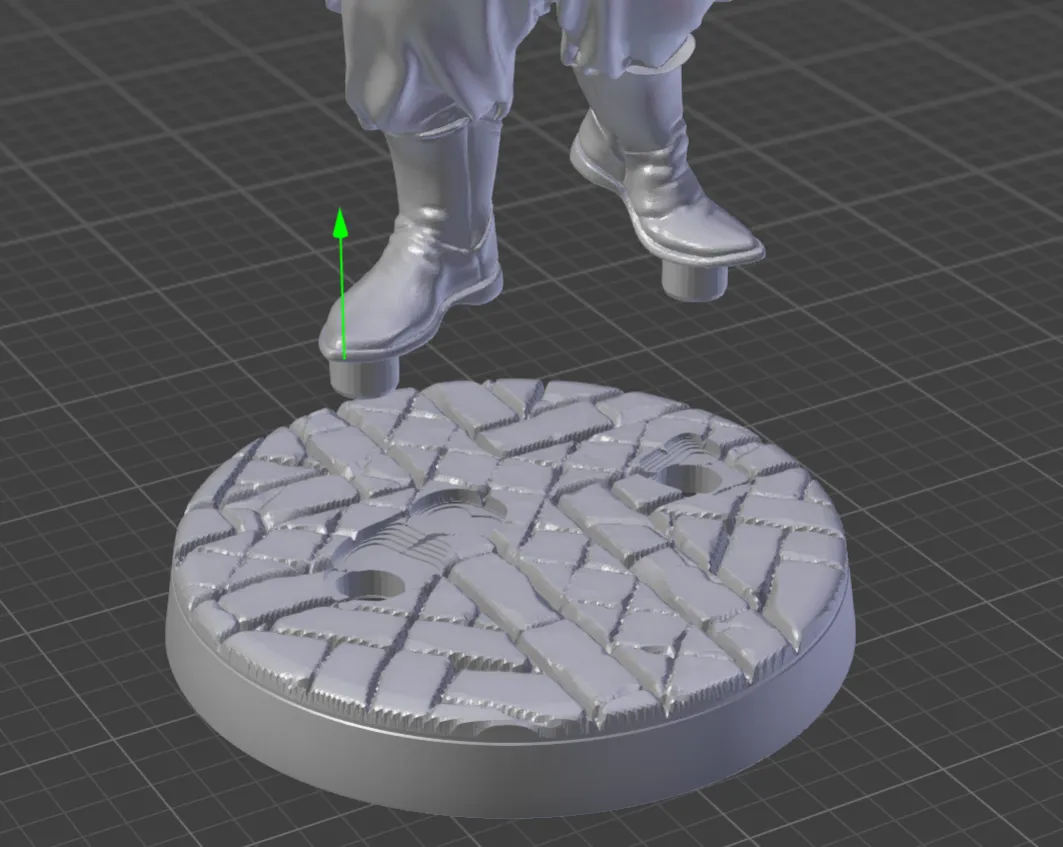
As well as adding keys you can add a footprint recess where the decoration intersects the base. This digs out a hole with a controllable amount of tolerance along the axis of insertion.
If you have multiple intersections and especially if you have multiple intersections of multiple decorations, this can be quite slow.
Once you have added your keys clikc on Preview to launch preview mode. This will generate an .stl of your base and decorations, add the keys and sockets and then reimport them into Basemancer. You will then be able to move decorations away from the base along their axis of insertion and preview the keys and socket.
When you export a keyed base a .zip file will be created with the different objects.